Flyer Template
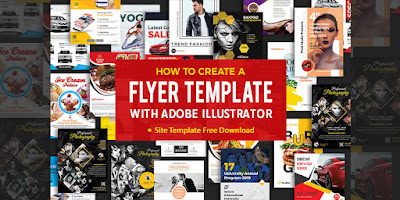
How to Create a Flyer Template with Adobe Illustrator. Flyers as a written information medium that is arranged systematically to convey or inform the promotion of a business product or service. Flyers are the choice of major companies in the world as an alternative media for marketing purposes, by disseminating them online through social media and print.
A flyer template is a file containing content and design elements that can be used as a starting point when creating a design project. All formats are available complete and you just need to add the desired needs in the leaflet.
By making your own flyer template design, it will definitely make work easier, make work more quickly completed, effective and efficient. Flyer template files can help you make document designs more attractive, professional, elegant, unique and creative.
What is a Flyer?
Flyers are one of the advertising media used to promote and inform related events, products, services and so on. In general, flyer designs contain images and words that are designed and designed well and professionally to attract attention and increase customer trust.
How to Create a Flyer Design with Illustrator
Creating a simple flyer template design does not mean that the flyer will look boring and unattractive. The basis for making a good flyer template is the selection of colors, fonts, as well as the right numbering position, content, and graphics.
Adobe Illustrator is one of the best and easy-to-use programs for creating flyer templates. This vector-based application is easily scalable in any size and shape, and the graphic art in Illustrator is of professional quality.
Illustrator can also integrate photos and allow users to create vector art with special effects from their photos. Here are some basics of creating flyer designs with illustrator:
1. Open Illustrator and click Print Document under the Create New heading on the welcome screen. If your preference is set to skip the welcome screen, select File then New from the application menu and select Print from the New Document Profile drop-down menu.
2. Set the size of your flyer in the New Document dialog box. You can create your own dimensions, but the Letter setting is pre-set for a standard 8.5 x 11-inch sheet of paper recommended for most people printing from home.
3. Select Type Tool from the Tools panel on the left of the workspace and add text to the flyer. You can create bullet text, which doesn't have a bounding box, by clicking anywhere on the artboard and typing. You can reposition this text or any object in an Illustrator document by selecting the Selection Tool from the Tools panel and clicking and dragging inside the text box.
Adjust the text character settings by highlighting them with the selected Tool Type and adjust the numbers and settings in the Character Tool Options bar above the workspace. You can create text that follows the shape or path you created by selecting the Type on a Path Tool nested under the Type Tool.
4. Add pictures on flyers. You can import photos or other graphics by selecting "File" then "Place" from the app's menu, or you can create your own with many of Illustrator's drawing tools and shapes. Select one of the nested shapes under the "Rectangle Tool" in the Tools panel and click and drag to create a shape. You can create any kind of star, polygon, or circle. You can change the look of shapes or add strokes by adjusting the settings in the "Path" Tool Options bar above the workspace or by adjusting the settings in the "View" palette to the right of the workspace.
5. Apply effects to text and images. Visit the Effects menu in the app's menu and try out different effects until you find something that suits your flyer's mood. You can make a shape into a series of strokes by selecting Effect, Stylize then Scribble and tweaking the settings in the Scribble Options dialog box. This effect can be very interesting if used correctly.
6. Select File then Save As from the application menu. Depending on how you will be using and printing flyers, you may want to save them in several formats. First save it as an AI file by selecting Adobe Illustrator (ai) from the Format drop-down menu in the Save As dialog box.
This format will save your flyer in vector format so that it can later be adjusted and resized, if needed, and can also be printed at home. If the flyer will be sent to the printer for mass production, select Adobe PDF from the Format menu. Click Save when you're done.
Site Provider Template Free Download
If you don't have much time to create your own flyer template design, then you can visit several free download template provider sites. These sites provide a variety of shapes, types, models, and vector colors that can be used for flyer design purposes.
Here is a free download template provider site:
- Template.net
- Freepik
- All-free-download
- Vecteezy
- Behance
- Pikbest
- Stocklayouts
- Resumekraft
- Freeimages
- Vector4free
- Pixabay
- Vectorstock
- Vector.me
Read Next: Functions of Adobe Illustrator Tools for Creative Graphic Designers
That's how to make a flyer template with adobe illustrator and a description of several free download template provider sites. Hopefully useful and can add knowledge about flyer design using adobe illustrator. Happy work and continue to be enthusiastic about learning graphic design.

💬 Comments